Dwarf Mini vs. Seestar S30 marks a new era in astronomy: that of the ultra-portable, smart telescope. Where we used to talk about systems that fit in a backpack, we are now talking about devices that you literally carry in your coat pocket to a dark location. This miniaturization is impressive, but it also brings specific physics challenges. As a telescope gets smaller, its light-gathering ability decreases and the software has to work harder to produce a usable image. In this article, we analyze how the Dwarf Mini relates to the Seestar S30 and what you can realistically expect from these compact systems.


First of all, what's in the box?
| Specification | DWARF Mini | Seestar S30 | Our judgment |
|---|---|---|---|
| Starting price (EU) | Around €450 | Approximately €499-€549 | Mini is cheaper |
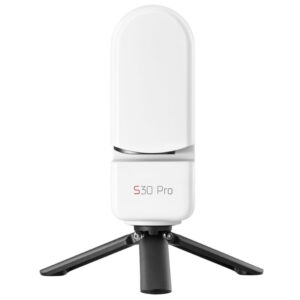
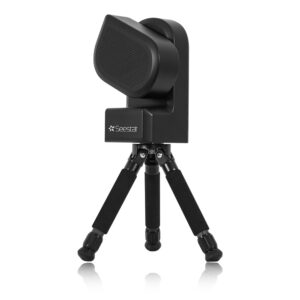
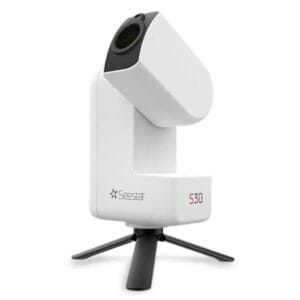
| Tripod included? | No (purchase separately) | Yes (Basic Tripod) | S30 comes with a tripod, Dwarf Mini does not. |
| Weight of the telescope | 0.85 kg | 1.65 kg | Dwarf Mini is lighter (but the weight of the S30 is including tripod). |
| Weight with tripod included | 1.64 kg (0.85 kg + 0.79 kg tripod) | 1.65 kg | About the same weight once all accessories are added |
| What's in the box? | Solar filter & basic accessories such as USB cable and protective case. | Solar filter, basic accessories, tripod and carrying case. | Little difference, although the S30 does come with slightly more accessories. |
Dwarf Mini vs. Seestar S30: Optical Limitations and the Reality of 30mm


The core of any telescope is its lens opening, also known as the aperture. Both the Seestar S30 and the Dwarf Mini feature a 30mm objective lens. In the world of optics, this means they are on equal footing on paper when it comes to light gathering. According to the laws of diffraction, as described in the optics guidelines of the European Southern Observatory (ESO)., the maximum resolution of a telescope is directly linked to the diameter of the lens. The smaller the lens, the less sharp the details at high magnification. With an identical aperture, both telescopes capture exactly the same surface area to receive photons, which is essential for making faint nebulae and galaxies visible. The difference in image quality will therefore be more determined by the quality of the glass and the sensor used.
Dwarf mini vs. Seestar S30: Sensor resolution and field of view
And precisely in that area... the sensor and focal length... we see a clear difference in how they image the sky when comparing the Dwarf Mini and the Seestar S30 (as can be seen in the image above).
The Dwarf Mini is primarily designed as a true wide-field camera. Due to the shorter focal length and the chosen sensor, you get an enormously wide overview of the starry sky. This makes the Dwarf Mini exceptionally suitable for:
- Large constellations: Like capturing Orion in its entirety.
- The Milky Way: Beautiful overview photos of the Milky Way arm from a dark location.
- Meteor showers Capturing a larger portion of the sky to catch shooting stars.
The Seestar S30 has a longer focal length, resulting in a narrower field of view (FOV) compared to the Dwarf Mini. While a 30 mm aperture remains compact for deep-sky work, the S30 focuses more on isolating specific objects. This allows objects like the Andromeda Galaxy or the Lagoon Nebula to be captured larger and with more detail. Therefore, the Dwarf Mini is more of an 'environmental viewer,' while the Seestar S30 takes its first steps toward targeted object photography.
Software, stacking and artificial intelligence of both telescopes
Because the hardware in both the Dwarf Mini and the Seestar S30 is so small, both devices rely heavily on 'computational astronomy'. This process involves the telescope taking hundreds of short exposures and stacking them on top of each other to reduce noise and build up light information.
The Seestar S30 benefits from the manufacturer's mature software, known for its effective algorithms for recognizing star patterns. The Dwarf Mini, on the other hand, bets on extreme speed and a very intuitive app experience. An important point to note is that the Dwarf Mini's compactness makes it more sensitive to vibrations. A solid surface is a requirement for both models, but with the light weight of the Dwarf Mini, even a breath of wind can affect the recording. The software tries to correct for this by discarding moved frames, but this does mean you have to expose longer in windy conditions for the same result.

One of the biggest differences between the Dwarf Mini and the Seestar S30 is the image processing workflow. With the Dwarf Mini, you go through the entire process from 'live stacking' to a shareable final result without ever having to touch a computer.
Once a stack is complete, you can open it in Stellar Studio within the DWARFLAB app. From there, you can 'stretch' the image, adjust contrast, apply noise reduction, and even add a watermark directly on your phone. This is a significant advantage for beginners; you don't need a special astrophotography PC or expensive software to get a nice final image. For experienced amateur astronomers, it's an ideal way to create a quick 'field edit' for social media or family/friends, while keeping the raw data for extensive post-processing at a later time.
In fact, the Dwarf Mini also saves FITS files during the process. This allows you to load the data into specialized software such as PixInsight, Siril or Photoshop when you return home. This makes it suitable both as the first telescope for a beginner, and a practical second setup for the advanced user.
Practical limits of both telescopes
It is our responsibility to avoid disappointment by being honest about the limits of this technique. In the Dwarf Mini vs Seestar S30 comparison, consider the following:
- No planets: Don't expect details on Mars, Jupiter, or Saturn. With a 30mm aperture, planets will remain little more than bright discs or points of light without structural details.

- Light pollution: Although both telescopes use digital filters, they cannot do magic. In a city with many lampposts, the results will be more limited than if you are stargazing in the mountains!
- Long wait times: Because the lenses are so small, you need a lot of time. A beautiful photo of a nebula often takes 30 to 60 minutes of 'stacking time' with these systems.
The advantage of the Dwarf Mini is its extreme portability, making it the ultimate gadget for anyone who always wants to have a telescope with them "just in case." The Seestar S30 is a bit more serious in terms of optical performance, but lacks the extreme pocket-sized factor of the Dwarf and requires the use of external software for post-processing.
The DWARF Mini vs Seestar S30: our final conclusion
We can make a long story out of this, but it remains quite simple in our opinion. The Dwarf Mini wins on mobility, larger objects, and ease of use. You don't need external software to enhance and share your astrophotos; you just need a pocket to carry it (ha-ha) - you have many more possibilities overall. The Seestar S30, on the other hand, is truly made for plug and play. You have to think less - you set it up, connect the telescope to the app, and you're ready to go. People who love such simplicity should definitely go for the S30! If you prefer a bit more control and don't feel like constantly removing your photos from your telescope and connecting them to a laptop/computer for post-processing, then just choose the Dwarf Mini.
All in all, both systems are excellent entry-level systems that remove the frustration of manually searching for stars. They are meant for learning and discovery, not to replace professional astrophotographers. If you are unsure about which format best suits your use case, check out our comprehensive telescope selection aid, where we will guide you step by step to the right model.
More comparisons to help you further
- DWARF 3 vs DWARF Mini Is the step up to the larger DWARF 3 worth it, or is the Mini sufficient?
- Seestar S30 vs S50 — how the S30 compares to its big brother (note: the S50 is no longer available).
- All models side-by-side? Check out our category smart telescopes.