The first look through an eyepiece is a moment you never forget. It is the transition from passively looking at NASA photographs to the raw, unfiltered reality of the universe. Before that first experience of success, however, comes the challenge of choice. The market is huge and the technical terms fly around your ears. To the best telescope for beginners to find, we must look beyond price or promised magnification. We need to understand how light works and how an instrument translates the cosmos before our eyes.
Check out the best telescopes for beginners here
Still not sure which telescope suits you? We are stargazers ourselves and happy to help.
Send us a WhatsApp messageWe reply on weekdays between 9:00 and 17:00.
The search for the best telescope for beginners
At Telescoop.nl, we believe that the best telescope is not the one with the highest magnification or the most expensive lenses, but the one you take outside most often. That's precisely where things often go wrong. Many beginners decide to buy telescope That sounds impressive on paper, but in practice it mostly leads to confusion and frustration. A too heavy tube, a wobbly tripod or an incomprehensible computer can ruin a wonderful hobby.
Stargazing is a lesson in patience and wonder. In a world of instant gratification, algorithms and fast timelines, astronomy forces you to slow down. The best telescope for beginners is one that facilitates rather than hinders this process. It should become an extension of your own senses, a window you open when the sky is clear and the world around you becomes quiet.
When looking to buy a telescope, it's essential to adjust your expectations. Many people expect to see images like those that appear online: colorful nebulae and razor-sharp galaxies. It's important to understand that visual stargazing works differently. A telescope is not a camera. With a good beginner's telescope, you'll see the moon with spectacular detail; you'll see shadows in the craters and enormous mountain ranges as if you were flying right above them. You'll recognize the rings of Saturn and see the cloud bands on Jupiter, including the dance of its four largest moons.
How does lens aperture work and why is it so important?
To make an informed choice from our range of telescopes, we need to understand the basics of optical science. First and foremost, a telescope is not a magnifying glass, but a light collector. The human eye is a wonderful instrument, but its pupil is simply too small to catch the faint photons of distant objects. A telescope acts as a giant bucket that collects light.
We call the size of this ‘bucket’ the opening or the aperture. This is the diameter of the primary mirror or the main lens of the telescope. The larger the opening, the more light the telescope collects and the more details you can see. A telescope with an aperture of 100 mm collects 4 times as much light as a 50 mm model. This difference is crucial for the best telescope for beginners. With a larger aperture, faint nebulae become brighter and details on planets become sharper. That's why telescopes with a large aperture, like Dobsonians, perform well, often many times better than smaller models that only promise high magnifications. For beginners, an aperture of 70 mm for lenses and 114 mm for mirrors works as an excellent starting point.
The role of focal length and aperture ratio
Besides the aperture, the focal length is the determining factor. This is the distance the light travels from the lens or mirror to the point where the image is brought into focus. In technical specifications, you will often see this indicated with an f-value. This number, together with the aperture, determines the aperture ratio, also known as the f-number.
The calculation each expert uses to determine which telescope for beginners suitable for a specific purpose is very simple: divide the focal length by the aperture. For example, if you have a focal length of 900 mm and an aperture of 114 mm, you end up with an f value of f/7.9.
A telescope with a short focal length and large aperture has a low f-value, say f/4 or f/5. These are called ‘fast’ telescopes. They offer a wide field of view and are excellent for viewing large objects such as the Andromeda Nebula. ‘Slow’ telescopes with a high f-value, such as f/10 or f/12, are often better suited for planets and the moon because they more easily achieve high magnifications with standard eyepieces. For the best telescope for beginners, an all-around ratio between f/6 and f/8 is often the ideal balance.
How telescope magnification works and the physical limits
Magnification is determined by the combination of the telescope and the eyepiece you use. The calculation here is also simple: divide the focal length of the telescope by the focal length of the eyepiece. If you choose an instrument from our collection of telescopes with a focal length of 1,000 mm and use a 10 mm eyepiece, you will magnify 100 times.
However, every telescope has a physical limit for magnification. The rule of thumb is that you cannot go beyond 2 times the aperture in mm. So an 80-mm telescope can magnify a maximum of 160 times under ideal conditions. If you go over this, the image will become dark and blurry. So the best telescope for beginners should not be chosen based on what it promises to magnify, but on what the optics can physically handle.
Mounts for telescopes: The foundation of stable observation
A telescope can have the best optics in the world, but on a shaky tripod it is useless. The mount It is the part that supports and moves the telescope. Anyone who wants to buy a telescope must first determine which type of mount best suits their own way of observing. We distinguish 3 main systems.
The Alt-azimuth mount
The Alt-Azimuth mount (AZ) is the most intuitive system and works exactly like a camera tripod: you can move the telescope horizontally (azimuth) and vertically (elevation). It is the best choice for those who want to get started quickly without technical hassle. Especially for children and beginning adults who want to scan the sky purely visually, this is often the best telescope for beginners.

The equatorial mount (abbreviated as EQ)
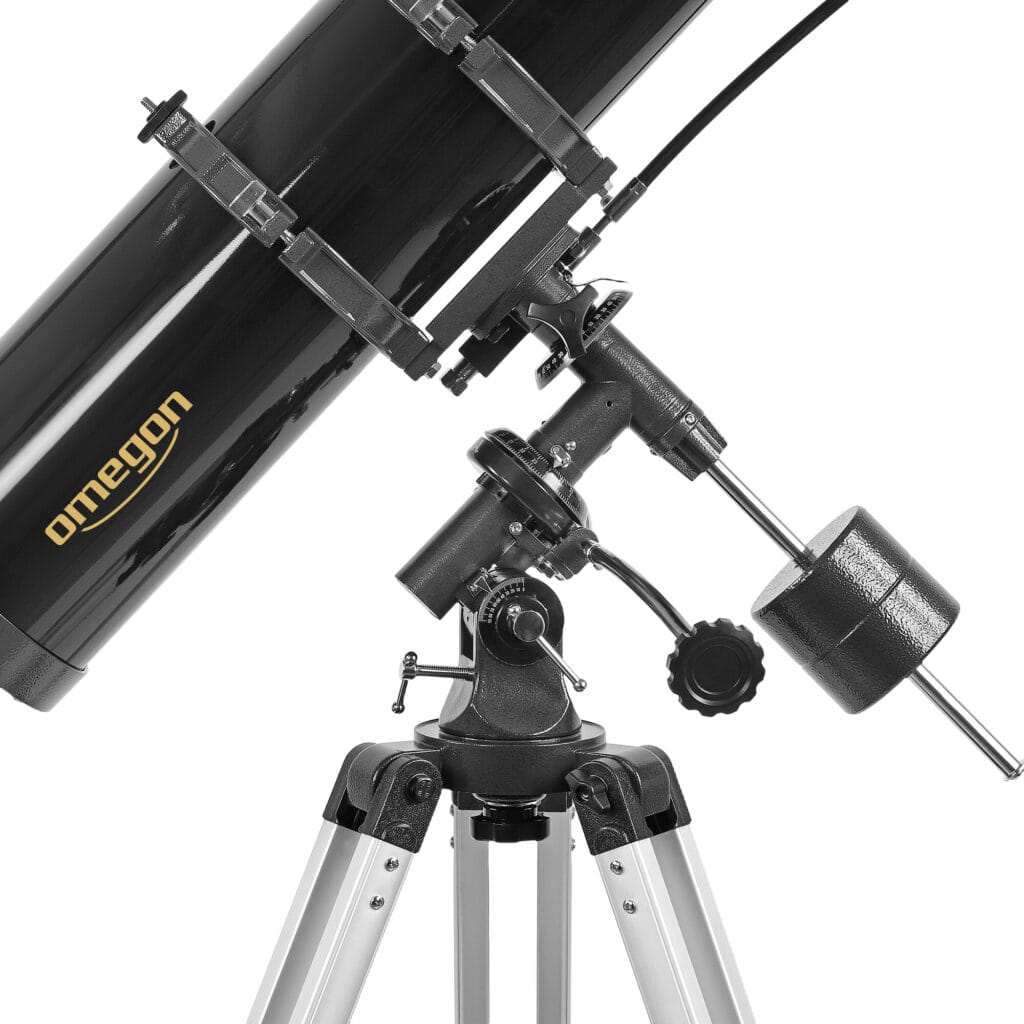
The Equatorial mount (EQ) looks more complex with its counterweights and inclined axes. The EQ mount is designed to compensate for the earth's rotation. By aligning one axis with the Pole Star, you then only need to rotate the telescope about 1 axis to keep a star or planet in focus. For those serious about getting started with a buying telescope for beginners and is interested in astrophotography, this system is essential.
The Go-to mounts
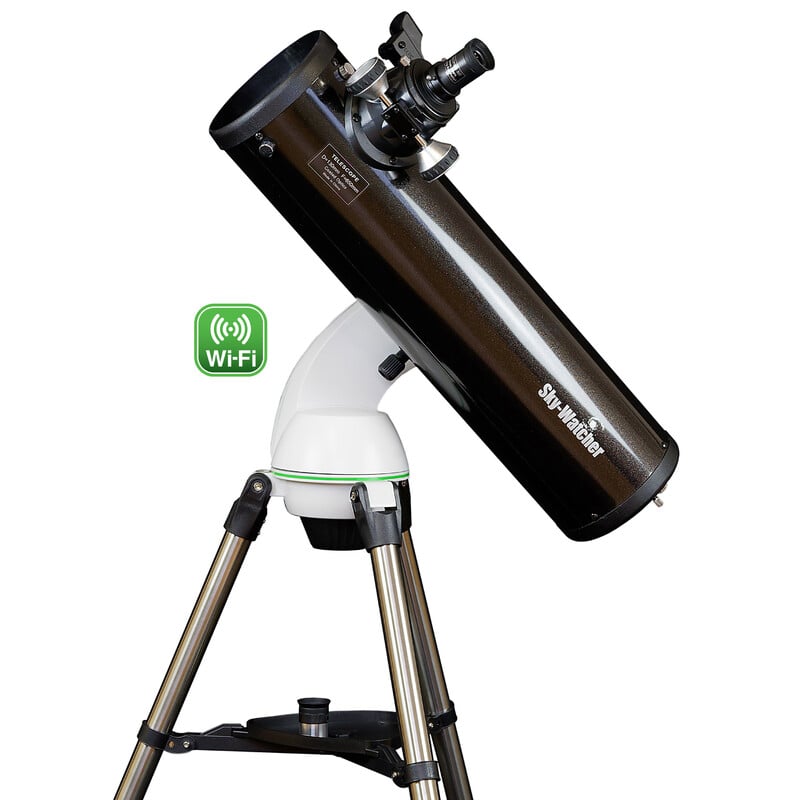
Finally, there are the computer-controlled Go-To and smart systems. After a short alignment, you type on a controller or in an app which object you want to see, and the motors automatically move the telescope to it. Brands like Seestar and Dwarf fall under the new generation. smart telescopes that completely automate this process. While this offers convenience, we caution that by doing so you miss the opportunity to really get to know the night sky for yourself.
Why the Dobson telescope is the best telescope for beginners
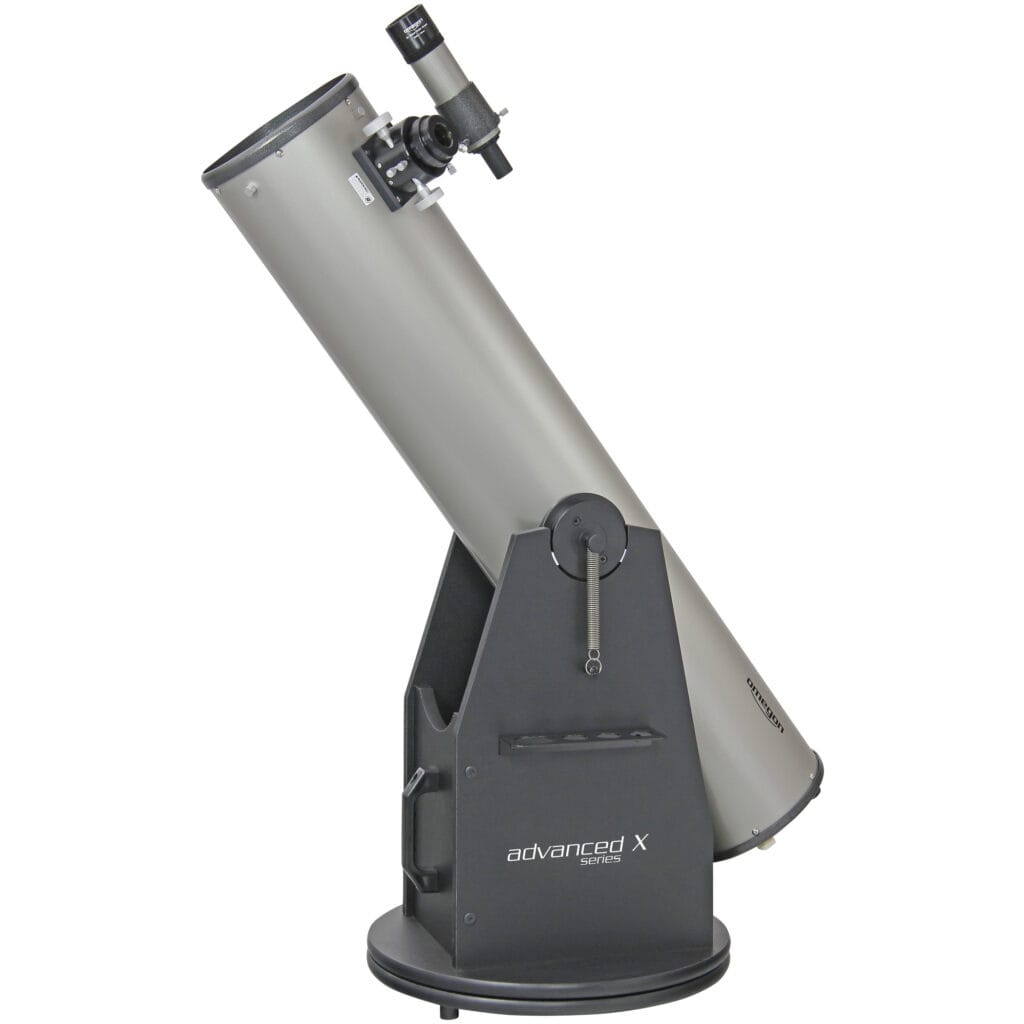
When discussing the best telescope for beginners, the Dobson telescope should not be left out. A Dobson is basically a mirror telescope on a very simple but sturdy wooden base. Since the manufacturer incurs hardly any costs for a complex tripod or expensive electronics, almost the entire budget goes to the mirror.
Want to see more? Check out the best Dobson telescopes here
For pure visual observation, the rule is to choose the largest dobson that fits your budget. That way you immediately have a telescope for life! With Oklop's custom-made carrying bags, you'll make your light cannon portable, too.
View all custom made tote bags here
Can you start the hobby even with a cheap telescope?
When faced with the choice of buying a telescope, budget is often the most determining factor. In our analysis of the best telescopes under 300 euros for 2026, we see a clear shift in the market. Where previously in this price range you were often limited to instruments that resembled toys more than anything else, we now see that entry-level models such as the Omegon 76/700 Newton offer a mature optical quality previously unthinkable.
The difference between a telescope under 300 euros And a mid-range model (350 to 500 euros) often doesn't lie in the magnification, but in the mechanical stability and the quality of the accessories. For an instrument under 300 euros, you have to take into account a tripod that is slightly more sensitive to vibrations. This is not a problem for viewing the moon, but when searching for distant planets, it requires more patience when focusing. However, by 2026 the standard will have been raised; even our most affordable telescopes for beginners are now equipped with eyepieces that offer a much wider field of view than the 2025 models.
View the best telescopes under 300 euros here
The best telescopes for kids: A flying start
When looking for the best telescope for children, different priorities apply than for adults. Children need an instrument that gives immediate results, is intuitive to operate and, above all, is robust enough to be enjoyed for years. For the very youngest explorers, we often recommend a clear refractor on a stable tripod. These models are virtually maintenance-free and show craters on the moon instantly in razor sharp focus, which is essential to keep curiosity alive.
The secret to a successful start for children lies in the simplicity of aiming. That is why models with an AZ mount (up, down, left, right) are often the favorite. On our site, you can use the filters very specifically to select by age, budget, and ease of use. Whether you are looking for an accessible model for a birthday or a serious instrument for a young astronomer who wants more depth, by filtering in our telescope category by ‘suitable for children‘, you will immediately find a selection that we have personally tested for durability and optical quality.
Check out the best telescopes for kids here
Explaining the different telescopes and accessories
Now that we've covered the basics of mounts and the science behind light gathering, it's time to look at the physical form of your instrument. This is because a telescope's architecture determines how effective it is for specific purposes. Anyone looking to buy a telescope will quickly discover that there are three main paths to take: the classic refractor, the powerful reflector, and the compact Maksutov. Each system has its own character and specialty.
The Refractor: The King of Contrast
The refractor is the oldest form of telescope, made famous by Galileo Galilei. This system uses a large glass lens at the front to bend and focus light. One of the biggest advantages of a refractor is that the system is completely enclosed. This means that the internal optics remain protected from dust, moisture and fingerprints, making it a very maintenance-free instrument. Is the eyepiece on the back of the telescope? Then you are dealing with a refractor telescope!
In addition, a good refractor produces an extremely sharp and high-contrast image. This makes it ideally suited for studying the moon and planets. However, with entry-level models you often see a purple or blue glow around bright objects, which we call color aberration. For those serious about getting started, we often recommend a model such as the Omegon 102/660 to. It offers enough aperture to beautifully image both planets and the brighter nebulae.
Check out the best refractor telescopes here
The Reflector: The champion of opening
The reflector, or Newton telescope, takes a completely different approach. Instead of a lens at the front, this system has a large mirror at the back of the tube. The large mirror at the back reflects light back to a secondary mirror at the front to the side of the tube where the eyepiece sits. This is where you then look through! An easy way to remember when you are dealing with a reflector telescope is if the eyepiece is at the front of the telescope.
Because mirrors are cheaper and easier to manufacture than large-diameter lenses, the reflector offers the most aperture per dollar spent. For those who want to look deep into the cosmos in search of faint galaxies and nebulae, this is often the best choice among our Assortment of telescopes.
Within this category, the Dobson telescope is an absolute favorite among beginners and advanced observers. This is basically a Newton telescope mounted on an extremely stable wooden box. Models such as the Omegon Dobson 152/1200 or the larger 203/1200 are often called “telescopes for life.” They are intuitive to use: you set them down and manually move them across the sky. The result is a visual experience where you see objects that remain simply invisible with smaller instruments.
Check out the best reflector telescopes here
The Maksutov-Cassegrain: Why this is the best telescope for planets
In many of our previous comparisons, the question came up: is the Maksutov really the best choice for planets? To understand this, we need to look at how we observe details on a planet such as Jupiter or Saturn. Planets are small and bright. To see details, you need a long focal length.
A Maksutov telescope uses a unique system of a meniscus lens and mirrors to fit a focal length of, say, 1,250 mm into a tube of only 25 cm. This results in an image that is free of the color aberrations you see with cheap lens telescopes sees, and a contrast higher than most reflectors. If your main goal is to study the Cassini separation in Saturn's rings, the Maksutov will still be the undisputed leader in its price range in 2026.
Check out the best maksutov telescopes here
Accessories: The last links of your perception
A good telescope is only half the equation. The accessories you place in the optical chain ultimately determine how effectively the instrument transports the collected light to your eyes. The eyepiece is the lens you actually put your eye against. As we learned in Part 1, the focal length of the eyepiece determines the magnification.
A crucial tool in this context is the barlow lens. This optical element doubles the focal brandlength of your telescope, and with that the magnification of any ocular you already own. With a set of 3 eyepieces and 1 Barlow lens, you effectively have 6 different magnifications, which gives you much more flexibility during a clear night.
Filters also play a big role. The moon filter is essential to dampen the moon's bright glare, allowing you to see more contrast in the craters. There are also color filters available to help study planets, such as a blue filter for the cloud bands of Jupiter or a red filter for the polar caps of Mars.
View all moon and planet filters here
View all eyepieces & barlow lenses here
From the moon, planets to galaxies: What can you see with a telescope?
One of the most-read blogs on Telescoop.nl was about what to expect when observing planets. Let’s expand on this to cover the rest of the sky. What you see is closely related to the type of instrument you choose when buying a telescope.
The Moon: With any telescope in our range you can see the craters, but from an aperture of 114 mm you start to see the ‘rills’ (fault lines) on the lunar surface.
Jupiter: In 2026, conditions are favorable for Jupiter. You can see not only the 2 main bands, but on good nights also the Great Red Spot as a subtle notch in the clouds.
The Orion Nebula (M42): Even through a small stargazer you can see this as a luminous bird shape. In a 203 mm Dobson you can see the structures of the gas and the 4 central stars of the Trapezium.
The Andromeda Nebula (M31): Don't expect spiral arms like in the photo; you'll see a huge, oval patch of light that fills the entire field of view of your 25 mm eyepiece.
When using a smart telescope, this picture changes completely. Where you visually look at shades of gray, the Seestar and Dwarf show you the colors of the Orion Nebula: soft pink and cyan blue. This is because the digital sensor collects light over a period of several minutes, something our human eye simply cannot do. For beginners seeking the “wow experience” of photographs, the switch to smart telescopes the most logical step in 2026.
Check out the best telescopes for planets here
Observing Deep-Sky objects: how to do it?
Observing deep-sky objects such as the Orion Nebula (M42) whether it Andromeda galaxy (M31) is a fun challenge with no ceiling, for any astronomer. Unlike the bright planets, these objects are extremely faint; they require a telescope with a large opening (minimum 150mm) to collect enough photons. In 2026, we see a clear split: the purist chooses a Dobson telescope for a purely visual experience, while the modern beginner with a smart telescope such as the Seestar S50 captures color and detail within minutes that the human eye can never perceive on its own. So there is no right or wrong, it's just what you want. You can also buy a visual telescope and a smart telescope!
The biggest barrier in deep-sky observation is not your equipment, but light pollution. To really reveal the beautiful gas structures of a nebula or the spiral arms of a galaxy, a dark location is essential. Use techniques such as verted vision (peripheral vision) to activate the light-sensitive rods in your eyes, or opt for digital support where software-based filters eliminate the glow of the city. Successfully “capturing” an object millions of light years away provides a satisfaction unmatched by any other hobby.
Buying stargazing equipment? Here's what you need to know before you tie the knot
You are now about to purchase your first real instrument. From our blog “Buying Stargazers? This is what you need to know!” we have distilled the key practical lessons that will make the difference between a lifelong hobby and a mis-buy.
First, pay attention to the secondary costs. When buying a telescope, people often forget that a telescope is an ecosystem. A good star chart or app is your navigation, but physical accessories like a comfortable observing chair or a case for your eyepieces greatly increase the enjoyment of use.
Second, transportability. The best telescope is the one you actually use. A huge 300 mm Dobson is wonderful, but if you have to walk 3 times to put it in the garden, you will more often leave it inside on nights with questionable cloud cover. Choose a size that fits your physical capabilities and the space in your car.
Finally: the quality of the eyepiece holder. Many beginners focus only on the mirror, but the ‘focuser‘It is the part that you touch the most. A smooth, precise focus (preferably a Crayford type) is essential to find that perfect sharpness at high magnifications on the rings of Saturn.
Night's practice: Strategy, smart telescopes and avoiding mis-selling
You've oriented yourself, understood the technology, and are about to take the step to buy a telescope. But the hardware is only half the battle. The biggest challenge for a beginner doesn't happen in the store, but under the starry sky itself. In this final part, we'll discuss how to make your first night a success and why most people, despite their best intentions, often take the wrong turn.
Why most people mis-sell (and how you can prevent it)
In my years of experience in the optical world, I have seen a pattern. The biggest mistake beginners make is being seduced by “spectacular” numbers on the box and dozen or so accessories from unknown brands. You often see claims of 600x magnification on an instrument that barely has a 60 mm aperture. This is pure marketing misdirection. As we calculated in Part 1, such a telescope cannot physically magnify more than 120x without the image becoming a blurry patch.
Another common pitfall is underestimating the importance of the mounting. People buy a beautiful telescope but skimp on the tripod. The result is an image that wobbles back and forth for seconds at the slightest touch or even from a gentle breeze. This makes focusing impossible and frustrates the viewing experience. The solution is simple: choose balance. At Telescoop.nl, we’ve curated our selection of telescopes so that the mount always matches the power of the optics, whether you’re looking for a model for yourself or an instrument for your child.
The “First Light” Experience: Your first night under the stars
In astronomy, we call the first time a telescope catches light “First Light.” To make this moment flawless, you must have a strategy. In fact, finding objects is a skill you must learn. The most commonly used technique is “star-hopping.” This involves using bright, naked-eye visible stars as signposts to hop step by step to your ultimate goal.
The steps for a successful first session are:
Acclimatization: Put your telescope outside at least 30 to 60 minutes beforehand to allow the mirror or lens to cool to ambient temperature.
The Seeker Check: Check that your viewfinder is still precisely aligned with your main telescope on a bright star or a distant lamppost.
Start low: Always use your eyepiece with the lowest magnification (the highest number in mm) to find an object. Only when the object is exactly in the center, change to a stronger eyepiece for more detail.
Digital navigation: Apps and software as your guide
We live in a golden age for the amateur astronomer thanks to modern software. Where you used to depend on paper charts and a red flashlight, you can now use your smartphone to find your way around. Programs like Stellarium (available for PC and mobile) are the industry standard. They show you in real-time what planets and nebulae are above your horizon.
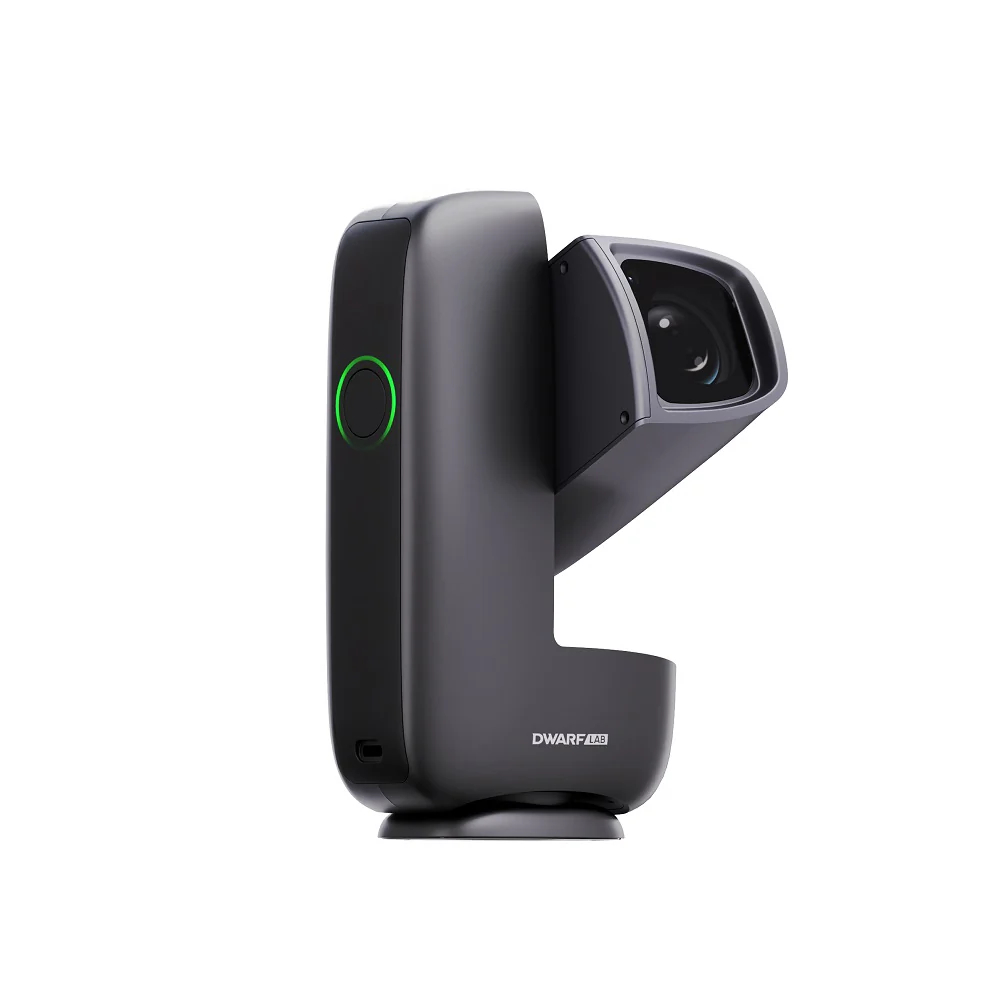
For those who choose a smart telescope, such as the Seestar S30 Pro Whether the DWARF Mini, With this software, it is even fully integrated. The telescope uses GPS and “plate solving” to know exactly where it is looking, after which it precisely targets itself on your chosen target. This takes the searching work completely out of your hands, leaving you more time to admire the image on your screen.
View the best smart telescopes here
Light pollution and stargazing: the reality
Your location determines 70% of what you can see. In some places in Europe we face significant light pollution. This is no problem for the moon and planets; they are bright enough to drown out the glow of the city. But if you dream of seeing the spiral arms of a galaxy, you will have to seek out a dark place.
Fortunately, there are special filters that can help. Deep-sky filters block specific wavelengths of light pollution (such as sodium lamps), which significantly improves the contrast of nebulae. When you look at telescopes on our site, you'll often find recommendations for such filters in the accessories section, which can greatly expand your visual reach from your own backyard.
View all moon and planet filters here
The psychology of stargazing: Why you're never bored
The beauty of this hobby is that your eye trains the more often you look. The first time you look at the Orion Nebula, you may only see a faint gray spot. But after a few sessions, you begin to see structures, dark dust trails and subtle differences in brightness. Stargazing is an active activity; your brain learns to recognize patterns in the dim light.
This is also why we've brought all the information from our scattered blogs together into this central hub. We want you to not only buy a telescope, but to develop a lifelong passion. Whether you start with an Omegon Newton 76/700 for your child or an advanced Seestar for yourself, the wonder remains the same.
Would you first like to look through a large telescope before you choose? On our page with observatories in the Netherlands and Belgium find out per province where you can attend a public evening
Still can't figure it out? Check out the decision tree to see what suits you right away!
Your road to the stars begins here
We've covered everything from the hard physics of light gathering and the various optical systems to the minutiae of eyepieces and software in this massive guide. You now know that aperture is king, that a stable mount is essential, and that your expectations must be realistic for visual observations. You also know that the best telescope for beginners is the one you will use the most!
The universe does not wait. Every clear night is a missed opportunity to discover something new. After reading these 5,000+ words, do you still have doubts about which specific model suits you?
Take the test: Use our interactive decision tree. This tool asks you exactly the right questions to arrive at your ideal match within 1 minute.
Check out the offer: Navigate directly to our full range of telescopes and use the filters on the left-hand side to select by price, aperture, and type.
Seek advice: Our experts are available every day to Help with buying a telescope that will last for years.
Welcome to the club of stargazers. We wish you many clear nights!
Are you ordering from Belgium? That works exactly the same as for Dutch customers, with Bancontact and delivery within two working days. On the page buy telescope in Belgium Read about shipping costs and how warranty and returns work.