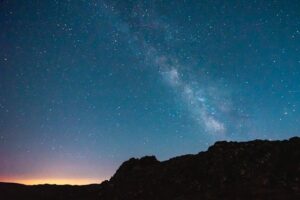
You've just spent a night photographing: dozens or hundreds of subs of a nebula, galaxy or cluster. You see on your camera screen a beautiful image, but still full of noise. You want to share it with your friends/family/acquaintances/astro-community.... The magic happens only now... behind your laptop or computer.
With the right astrophotography software explanation from us, which addresses the use of software such as DeepSkyStacker, Siril or PixInsight you can stack those single images (stacks), clean, align and bring to life. In this guide, we'll show you exactly what to do, in what order, and what to look out for.

Preparation: organize your files (very important)
First, put all your files on your computer and create four folders:
- Lights - The real shots of the object.
- Darks - same settings, lens cap on.
- Flats - short shots of an evenly lit background.
- Bias - the shortest possible exposure time.
Use clear file names, for example:M42_light_001.CR2, M42_dark_001.CR2, etc.
Once this is well organized, you can start in your software.
Step 1 - Calibration in DeepSkyStacker (free and quick)
Open DeepSkyStacker.
- Click on “Open picture files...” and select all your lightframes.
- Then click on “Dark files...”, “Flat files...” and “Bias/Offset files...” to add the appropriate calibration files.
- For all files, check the box on the left to so that they are active.
- Click at the top on “Check all” to select everything.
- Select “Register checked pictures...”.
A settings window will now appear. Use this as a starting point:
- Star detection threshold: 10%
- Register already registered pictures: checked
- Compute the number of detected stars: click on this. You want between 80-200 stars per frame.
Then click on OK. DeepSkyStacker will now automatically analyze, align and grade all images for quality.
Once that is done, you will get a list of “Score.” Sort by this column and deselect the worst 20-30%.
Then click on “Stack checked pictures...”.
In the stack menu, choose:
- Result: “Create a 32-bit integer FITS file”
- Stacking method: “Kappa-Sigma Clipping”
- Use per channel background calibration: checked
Click on OK and let the program do the math. This can take several minutes to hours depending on your data set.
At the end, you get one big file: Autosave.tif. That's your stacked, linear shot.
Step 2 - Open the stacked image in Siril for post-processing
Siril is ideal for next steps because it is free and gives a lot of control.
- Open Siril.
- Go to File → Open and select
Autosave.tif(orMasterLight.fitsif you are using PixInsight). - At the top, click on “Auto-stretch” (the histogram icon with an asterisk). This way you can immediately see what is in your image.
It probably looks like a pale, gray nebula (or galaxy) with slight gradients. That's normal.
Step 3 - Neutralize background and color
Go to Tools → Background Extraction.
- Click on “Generate grid” (standard 20×20).
- Check that the small boxes are not on bright nebulous areas. If necessary, move them around.
- Click on Apply.
The background will now be uniformly gray.
Then go to Color Calibration → Background Neutralization.
- Click on a neutral piece of background and confirm.
- Then on Color Calibration: choose a white or yellow star as a reference.
The image now has realistic colors with no green or blue tinge.
Step 4 - Histogram stretch
Click on the Histogram icon (top right).
- Slide the middle slider slightly to the left until the nebula becomes visible.
- Repeat three or four times, always taking small steps.
- Make sure the background remains dark gray, not pitch black - otherwise you clip the faint details.
You can also use the Auto-stretch use as a starting point and then fine tune manually.
Step 5 - Remove noise and enhance details
Go to Image Processing → Remove Green Noise To neutralize any residual color.
Next:
Image Processing → Histogram Equalization for local contrast, or use Wavelets → Sharpen.
Work with small radius (1.5-2) to reveal fine structures in nebulae without overexposing stars.
If you see noise in dark areas:
Process → Noise Reduction → Median Filter, and set the force to 0.5-1.0.
Step 6 - Save and export
Are you satisfied with the result?
Then go to File → Save As... and select TIFF (16-bit) For post-processing in Lightroom or Photoshop.
If you want a web version right away, choose PNG and adjust the colors slightly if necessary.
Alternative: the workflow in PixInsight
For those with PixInsight works (paid, but very powerful), you can largely automate the process via the WeightedBatchPreprocessing-script.
- Start PixInsight and open Script → Batch Processing → WeightedBatchPreprocessing.
- Add your Lights, Darks, Flats and Bias Add in the appropriate tabs.
- Click at the bottom on Run.
PixInsight automatically performs calibration, registration and stacking and saves a masterLight.xisf on.
Open that file and then use the following tools:
- DynamicBackgroundExtraction (DBE): click 20-30 sample points, press Execute.
- PhotometricColorCalibration (PCC): automatically fills in correct colors based on stars.
- HistogramTransformation: Slowly pull the midtone arrow to the left to reveal detail.
- MultiscaleLinearTransform: Use this for noise reduction (mask on background).
- CurvesTransformation: Add subtle contrast and color.
Then save as TIFF and open in Photoshop if necessary for the finishing touches.
Check result
Compare your final image to an individual subframe:
- The nebular structures are much more clearly visible.
- Noise is minimal.
- Colors are true to nature and stars are round.
If the background is still spotty, apply slight background correction again.
Common mistakes in stacking and editing
- Too few darks or flats → visible circles or dust patterns.
- Too aggressive stretch → details in haze disappear.
- No frame selection → blurred final image due to poor subs.
- Gradient points on haze → important data filtered out.
- No backup → irretrievable loss of original data.
Summary of workflow
- Export to TIFF or PNG.
- Organize files into Lights, Darks, Flats, Bias.
- Calibrate in DeepSkyStacker (check 80-200 stars, use Kappa-Sigma Clipping).
- Stack into one linear image (
Autosave.tif). - Post-processing in Siril: background correction, color neutralization, histogram stretch, sharpening, noise reduction.
- Optional: advanced post-processing in PixInsight (DBE, PCC, MLT, Curves).
Conclusion
With this practical astrophotography software explanation you can get started right away. You now know exactly where to click, what settings work and what you can skip.
The combination of DeepSkyStacker for stacking and Siril or PixInsight for post-processing gives a workflow that both beginners and experts use: fast, reliable and fully controllable.
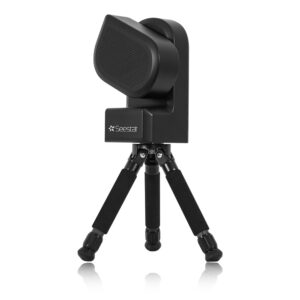
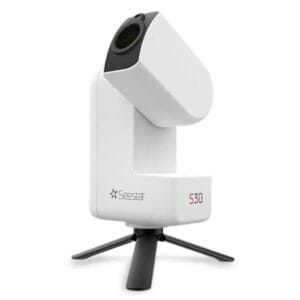
Want to take automatic editing further? Then discover the Seestar S50, or telescopes below that perform many of these processes automatically. However, with this roadmap included, you get yet more beautiful astrophotos! Happy stargazing!


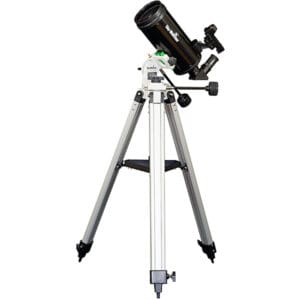
- Price range: € 1.259,00 through € 1.999,00 Select options This product has multiple variants. The options may be chosen on the product page
- Price range: € 4.499,00 through € 4.699,00 Select options This product has multiple variants. The options may be chosen on the product page
- Price range: € 2.499,00 through € 2.699,00 Select options This product has multiple variants. The options may be chosen on the product page