


Dew Caps & Ventilation: Never suffer from condensation or heat build-up again
Dew caps and ventilation systems are indispensable accessories for those who want to observe clearly and uninterrupted. Condensation on the corrector plate or eyepieces can abruptly disrupt your observing session, while heat buildup in your optics causes airflow and blur. In this comprehensive guide, you'll read:
Why dew inhibition is crucial
Different types of dew hoods and heating methods
Fans, cooling rings and active ventilation
Installation, use and maintenance tips
1. Why dew and inadequate ventilation are a problem
Condens
During nighttime cooling, moisture forms on glass surfaces, coating your optics and blurring your image. Even light dew can have a big impact on sharpness and contrast.Thermal turbulence
Internal heat differences between the option tube and the outside air cause turbulent air layers, leading to “seeing” loss: stars flicker, and details volatilize.Damage and mold
Prolonged exposure to moisture can degrade coatings and cause mold growth on mirrors and prisms.
2. Types of dew inhibitors
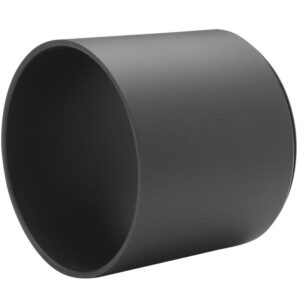
a. Passive dew hoods
Rubber or neoprene sheaths: easy coverage and isolation around the corrector or eyepiece; inhibit direct dew contact.
Felt and fleece covers: extra layer of insulation, but can themselves retain moisture if they get wet.
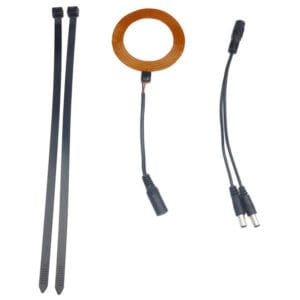
b. Active heating systems
Heating ribbons: thin, self-adhesive heating tapes with adjustable thermostat; continuous heat emission around the lens edge.
Rechargeable dew-heaters: compact units with internal battery providing several hours of heat without external power.
3. Ventilation and cooling solutions
a. Frontline fans
Small, battery- or USB-powered fans that snap onto the front lens ring and create constant air circulation to dissipate warm air.
b. Body fans
Mounted on the side of your option tube; draw incoming air through grilles and push warm air away from the optics.
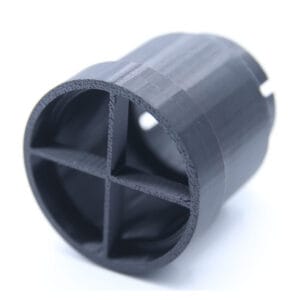
c. Cooling rings and heat buffers.
Metallic cooling elements (aluminum rings) pre-cooled in the refrigerator, which gradually bring the temperature of the tube to the environment without quickly forming condensation.
4. Installation and usage tips
Placement
Make sure the heating ribbon or fan is tight against the edge of the corrector or eyepiece.
Keep wires out of the movement paths of the focuser and mount.
Thermostat settings
Set the dew-heater to just slightly above the air temperature (0.5-1 °C higher) to actively prevent condensation without overheating.
Fan speed
Start at low setting; increase speed only if thermal turbulence symptoms occur.
Energy Management
For field work: use rechargeable powerbanks with enough capacity for all heaters and fans throughout the session.
Combination
Active heating and ventilation together provides the best protection against both condensation and internal turbulence.
5. Maintenance & longevity
Cleaning
Dust ribbons, carriers and fan blades regularly with compressed air and a soft cloth.Check
Inspect wiring and contact separations for wear; replace damaged cables immediately.Storage
Wrap heating ribbon carefully and store in a dry area away from sharp objects.
Frequently Asked Questions about Dew Caps & Ventilation
What exactly does a dew-heater do?
A dew-heater emits heat around the lens edge, keeping the lens just slightly warmer than the ambient air and preventing condensation.How do I determine the correct dew-heater capacity?
Choose a model that delivers at least 2 W per inch of front lens diode; for larger diameters, up to 5 W/inch.Can you cut a heating ribbon to size yourself?
No, heating elements are constructed in closed circuits; always use the length recommended by the manufacturer.How long does a rechargeable dew-heater last on one charge?
Depending on type and capacity: typically 4-8 hours of continuous use at average setting.Is a fan alone enough to prevent condensation?
Ventilation helps reduce thermal turbulence but does not prevent condensation; combine with a dew-heater.When do I turn on the fan?
Immediately when aligning your scope; active air circulation prevents hot air from remaining in the tube.Can I leave my dew-heater/controller hanging outside?
Yes, most are splash-proof, but store them in a dry bag after use to reduce wear and tear.Should I turn off the dew-heater at break time?
It is safer to turn it off and insert the lens cap; prevents overheating and energy waste.Clean fan blades with compressed air or cloth?
Use compressed air for coarse dust removal and a soft cloth for stubborn stains.How do I optimally position a front-lens fan?
Place the blade just in front of the lens, pointed along the tube, so that airflow does not block the view.Can I combine multiple fans?
Yes, for larger telescopes you can use both front and body fans for maximum air circulation.What happens if I set the dew-heater too high?
Overheating can corrode lens coatings and cause air currents that degrade your image quality.Is a rubber dew-cap sufficient for all conditions?
Rubber caps provide only passive insulation and work limitedly in heavy dew formation; active heating is more reliable.How do I avoid cable clutter with heaters and fans?
Use cable ties and route all wires along the focuser mount to keep moving parts clear.What power supply is needed for my dew-heater and fan?
Usually 12 V DC; some front-lens fans operate on USB-5 V.Can I use a dew-heater on a 9 V battery?
Not recommended: the heater does not perform adequately and often draws more current than a 9 V battery can supply.How do I install a body fan on an SCT telescope?
Mount the fan in one of the existing accessory ports or on a homemade plastic bracket.Does ventilation affect my alignment?
Not if you mount the fan securely; vibration becomes minimal with quality fans.Should I set my dew-heater differently in winter?
Set it slightly higher on very cold nights, or use higher power to counteract extra dew pressure.How do I test whether my dew-system is working effectively?
Let the scope cool for 30 minutes without heater, observe condensation, then switch on the dew-heater and note the difference.